Object Tab Settings
General
The Object Tab widgets are used to assign various properties to individual Mesh Objects that govern their use and behavior within X-Plane. We typically say these settings are per Mesh Object. If you're not exactly sure what a Mesh Object is, see the Appendix > Geometry Terms section for more info.
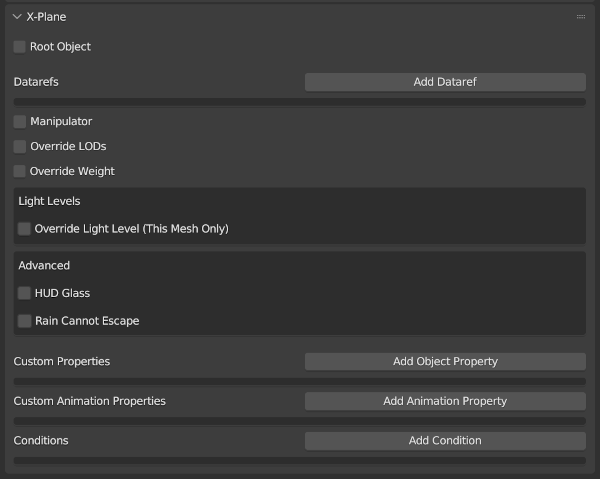
Most Mesh Object widgets are contextual and will not be visible until a checkbox is enabled or button pressed. A Mesh Object needs to be selected and be the ACTIVE object in order to apply (or show) XP2B properties on that Mesh Object. The X-Plane panel will always show the settings for the last Mesh Object selected. The panel for a Mesh Object with no properties set on it is shown below.
Object Tab UI Browser
Add Dataref Button
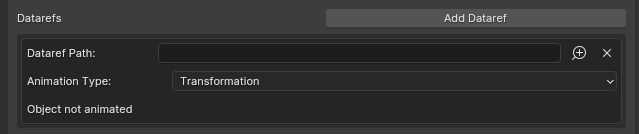
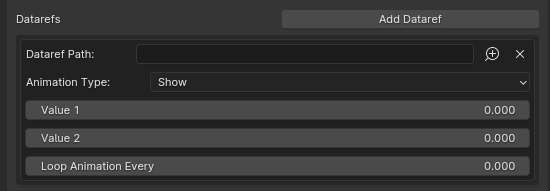
When you hit the Add Dataref button, the UI dialog shown below will appear below the button. When you want a Dataref to drive a Mesh Object ( or Bone, see Bone Tab ) animation, or cause the Object to appear/disappear based on a dataref value, then you configure those parameters in this panel.
Each time the Add Dataref button is clicked, a new UI panel is added, but each UI panel only accomodates one dataref. Most of the time only one animation dataref is attached to an Object/Bone, but if both animation and show/hide behaviors are required, which is relatively common, then you will have two dataref UI panels. Its rare to need more than two per Blender Object.
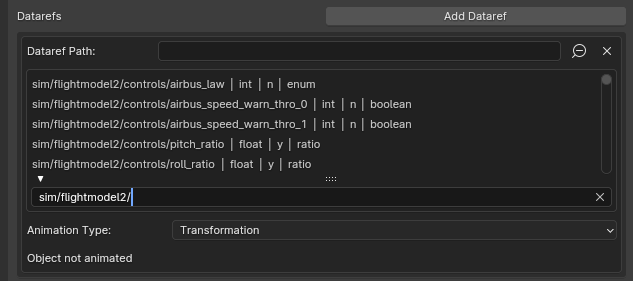
Dataref Search Box
When the magnifying glass (+) icon is clicked, the Dataref Browser and search bar will be presented as shown below. You can click the magnifying glass (-) icon to close the search box or select a dataref from the list, which will automatically close the search box also.
Animation Type Pulldown
Once you've selected a dataref to drive your animation, you need to specify what animation feature it drives, either a movement (rotations / translations) or its visibility (show/hide). Datarefs for controlling the visibility of entities are selected in the same way as described above, using the search box or entering manually; however, The Animation Type pulldown is set to either Show or Hide, and displays the widgets shown below.
Keyframe Values Panel
When Blender keyframes do exist on the selected Mesh Object, then the Dataref Animation panel will appear as shown below, allowing you to map Blender keyframes to Dataref values.
See the Workflows > Animation section of this manual for more detailed information and examples of how to set up animations and keyframes.
Manipulator Checkbox
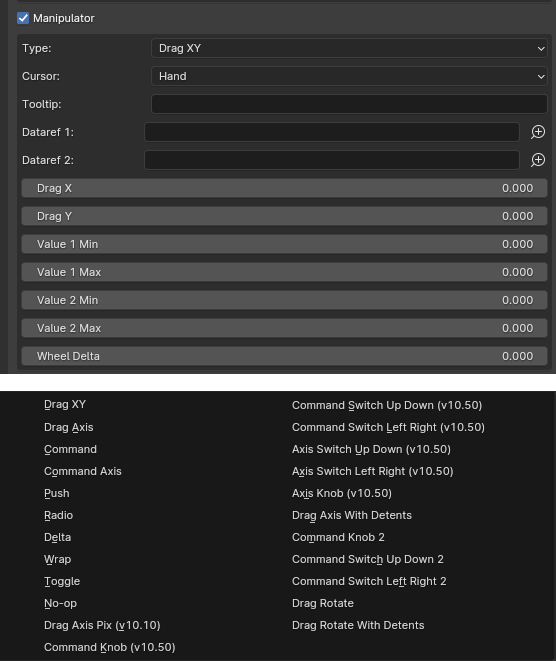
Manipulators are Mesh Objects that act as click spots in 3D space. This checkbox appears whenever a Mesh Object is selected and is not visible when other types are selected.
When enabled, then additional widgets to configure the manipulator parameters will appear below. The exact widgets shown will vary depending upon the type of manipulator selected in the Type pull-down menu. The Drag XY type is shown below as an example.
See Workflows > Manipulators for more detailed information on using and configuring each type of Manipulator, or select one of the manipulator types below for more information on that type.
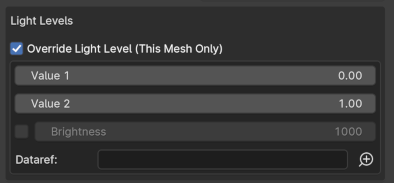
Override Light Level Checkbox
When this checkbox is enabled on a Mesh Object, then the following widgets will appear. These widgets allow you to set the per Mesh Object Light Level parameters per Mesh Object, rather than per Material. Any Light Level settings here will override any that are configured on the Mesh Object's material.
See Workflows > LIT Textures section of this manual for more detailed information on using and configuration LIT textures and LIT levels.